Showing posts with label Decor. Show all posts

Sunday, September 27, 2020

My Favorite Amazon Purchases

Hello everyone!
Amazon just announced that they have decided to have Prime Day in October this year! 
So, I thought it would be the perfect time to share with you a few of my favorite things I have purchased from them over the years.
With the holidays just around the corner, maybe you can find some ideas for the people on your Christmas gift list.

Blue Light Glasses


I bought these on a whim at the beginning of the year with some leftover money on a Christmas gift card and I have worn these bad boys every day...
Are blue lights really something to be concerned about? 
I am not sure.
Do I spend all day staring at screens?
Yes. Yes, I do.
And I am not taking any chances.
Plus, they make me look put together on days when I am not.
Blue Light Glasses run from $13.99 - $17.99, are available in 5 different colors and come with a soft case and cleaning cloth.
I have them in the color Tortoise.


 LED TV Backlight


You guys, advertisements work on me.
They have since I was a child.
So, when I started seeing everyone and their dog jumping on the TV Backlight game, I had to join in.
And, I have no regrets.
Erik and I spent a lot of our free time before quarantine watching movies and TV so, as you can imagine that is ALL we have done this year. 
The backlight creates such a fun atmosphere and I can't wait to use it while we watch holiday movies during the next few months.
Backlight runs from $16.99 - $39.99, accommodates TV's 24-82 inches, has 16 different color choices, and comes with a remote.


 Sequin Tablecloth


Ya'll know I love any reason to celebrate.
I purchased this sequin tablecloth a few years ago and use it for EVERYTHING!
St. Patrick's Day breakfast, weekend brunch, Star Wars Day.
You name it, it's seen it.
Tablecloth ranges from $14.50 - $46.50 and is available in sizes 50x80 - 90x132.
I purchased the 60x102.


 Pearl Barrettes


I love to try out new trends especially when they are cheap...
The last few years hair accessories have become big and I wanted in.
After seeing barrettes cost upwards of $20 I decided to check amazon.
And there they were.
2 oversized pearl barrettes for $5.
It was a no brainer.
I have loved using them to dress up simple hairstyles and always receive compliments when I do.
So go ahead and grab yourself a pair.
You deserve it.
$4.99 for 2 pearl barrettes.


Movie Scratch Poster


As I mentioned, Erik and I consume a lot of TV and movies.
We are always looking for new content to watch. 
Which led to the purchase of the movie scratch-off poster.
It comes with 100 scratchable squares attached to a top-rated movie.
Once you have watched the movie, you scratch off the square to reveal a bright minimalist movie poster.
A fun activity and a piece of art for your home.
I call it a win, win.
Currently $19.97.


Coffee Table Books


I love decorating my house with pretty coffee table books.
They come in all sizes, colors, and themes so they make the perfect finishing touch for every space.
I don't think there is a room in my house that does not have at least one coffee table book as decoration.
And I get the majority from Amazon.
Here are a few of  my favs.


Beanies


It is officially beanie season!
I purchased these beanies for a friend's bachelorette party a couple years back.
They were cute, cheap and I needed several.
I had no idea how soft and stylish they would be.
Plus the cable knit detail and pom-pom on top!
To die for...
Needless to say, I have wanted to order every color since they arrived, and now is the perfect time to do so!
Beanies are $11.99 and come in 17 colors.
I have the beanie in the color olive.


 So, there you have it.
A few of my favorite Amazon purchases.
Hopefully, it gave you a few gift ideas for your gift list or... for yourself.
What's your favorite thing you have ever purchased from Amazon?

All my love,
Autumn

Monday, July 6, 2020

Ziggy's First Birthday

Hello everyone!
Last weekend we celebrated our dog Ziggy's first birthday!
As you probably remember from our first puppy Scout, we LOVE to throw themed parties for our pups.
For Ziggy's first birthday we decided to go with a space theme.
He is Ziggy STARdog after all...


I used a black table cloth as a backdrop and set up our banquet table in front of it with a navy tablecloth on top.


On the left side of the table, we placed Ziggy's presents dressed up in dark colors and metallics.


In the middle, his birthday cake.


I displayed it on a silver cake stand to give it an industrial feel and topped it with a number 1 and a few star candles.


In front of the cake, gold plates, and napkins to help us serve. 


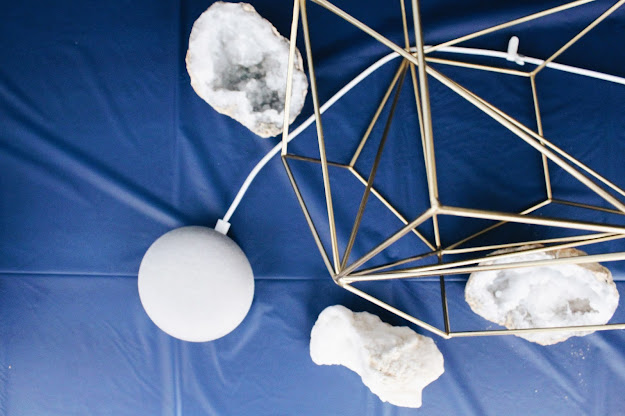
On the right side of the table, we have a few random items from around the house that I felt were "spacey."


A gold geometric sculpture, some decorative geodes for moon rocks, and our Google speaker.
I thought it looked like a space communication device?


To the left of the banquet table, we had our letterboard surrounded by a few gold stars.


It read:
3...
2..
One...
Blast off! 
With one spelled out as it is his first birthday.


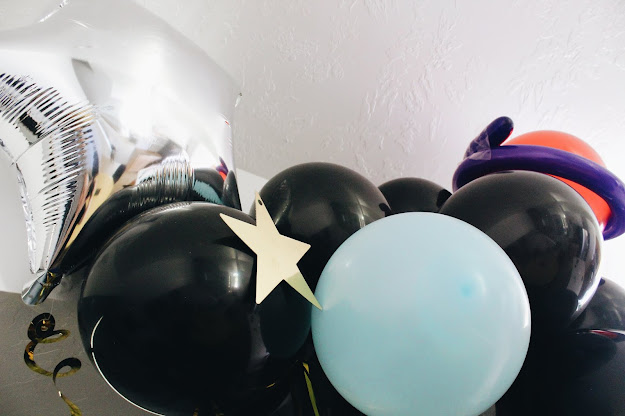
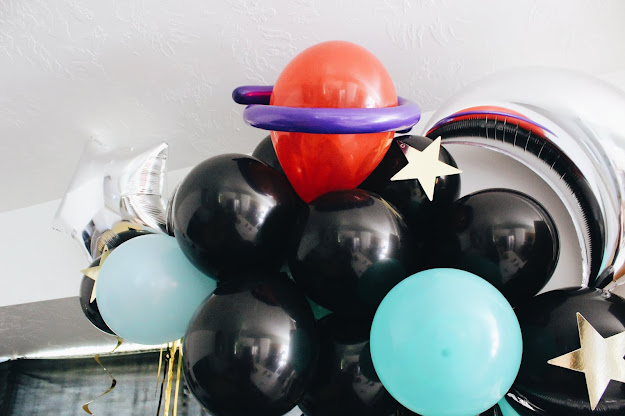
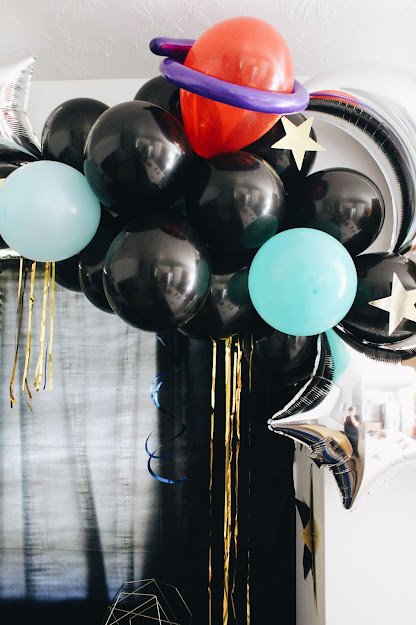
The thing I was most satisfied with was my balloon garland.
This was the first thing I envisioned when we started planning his birthday.
I placed it above the right side of the table.


I stayed with my deep space colors of black and blue.


To make it feel more space like I added a few star cutouts, 
some metallic accents, star balloons, a moon balloon,


 and I turned one of the balloons into a planet.


This bad boy did not want to stay up but with some persistence (lots of tape and thumbtacks) we got it up for good.


We spent the day opening presents, eating cake and playing at the park.
I think that Ziggy really enjoyed his first birthday.
His tail wouldn't stop wagging and he crashed hard at the end of the day.
I can't wait until he experiences his first Christmas with us.
I think he's gonna love it!
Do you celebrate your furry friends birthdays?


All my love,
Autumn
Sunday, June 14, 2020

DIY Metallic Mountain Wood Cut Out

Hello everyone!
Summer is finally here and for us, that means cabin season.
Erik and I were both lucky enough to grow up with grandparents who own cabins.
Both of our family cabins are still around and in the summer we try to get up to them as much as possible.
I have been slowly adding a few of my own touches to my family cabin over the years.
I found a wood mountain cut out at Michael's and decided to dress it up for my next piece of cabin decor.


You will need:
A Wood Cut Out, Any Shape Works!
Paint
Paintbrush
Mod Podge
Metal Leaf


Paint the wood your desired color.
I couldn't decide between a navy mountain or an olive mountain so, I went with both!
I painted one side navy and the other side olive.
That way I can use it with different decor over the years.


Let the paint dry.
Apply additional coats if needed, I did three.
Once the paint is completely dry, start to apply your metal leaf.
I used silver leaf for the navy mountain and gold leaf for the olive mountain.
The instructions my metal leaf came with said to use a special adhesive specifically for metal leaf but I didn't want to spend more money so, I went with Mod Podge since I had it on hand. 
Apply a thin layer of Mod Podge to the area you want your metal leaf.
I found it was best to work in small sections.
Immediately apply the metal leaf onto the Mod Podge and using the backing paper gently rub onto the wood.


Once the metal leaf is secure carefully remove the backing paper.
Repeat until you have the metal leaf in all of your desired places.
I kept mine on the peaks of the mountain.


Use a soft brush to remove excess metal leaf.
Apply another thin layer of Mod Podge on top of the metal leaf to secure into place.
Let dry.
Enjoy!


I am very excited to take this up to my family's cabin this year.
The metallic accents will add a little glamour to our rustic cabin.
Which is just the way I like it. ðŸ˜‰
What color do you prefer?
Navy? 


Or olive?


All my love, 
Autumn

Sunday, April 12, 2020

Quick and Easy DIY Floral Initial

Hello everyone!
Springtime is upon us even though we are stuck in the house...
Today I am going to show you an easy DIY for a floral initial.
It's the perfect decoration to bring a little springtime to your home.


You will need:
Wood Initial
Flower Blooms
Wire Cutters
Hot Glue Gun
Hot Glue Sticks


Using the wire cutters, cut the flowers and leaves from the stems, getting as close to the base as possible to help them lay flat.
Starting with the large flowers, arrange on the initial in your desired position.
Add in the medium flowers.
Then the small flowers.
Then add in the leaves to fill in any open spaces.
Once the letter looks how you'd like, hot glue the flowers and leaves into place.
Let dry.
Enjoy!


This craft is super quick and simple.
It took me around ten minutes to create.
It would look so cute sitting on a shelf, or you can add it to other items around the house to give them some spring flair.
We added ours to our boxwood wreath on our front door.
It would also make the perfect gift for Mother's Day.
It's coming up!
Hint, hint.
How would you style a floral initial?


All my love,
Autumn 
Sunday, March 15, 2020

DIY Rainbow Balloon Art

Hello everyone!
I think we could all use a little more rainbows in our life with all of the craziness going on in the world.
And with St. Patrick's Day just a few days away I am here to make that happen with this fun DIY rainbow balloon art!
We currently have this set up in our house making it very festive.
Plus, it makes us both happy!


You will need:
Balloon Pump, Optional
Tape


Decide on the design of your rainbow.
I wanted a full rainbow with white balloon clouds on either end.
You could do a full rainbow like me, or do half a rainbow.
It's up to you!
Blow up your twisty balloons.
I decided three balloons in each color would work for me.
I'd highly recommend a balloon pump when working with this many balloons. 
The twisty balloons don't have a lip like normal balloons so, I just taped the ends to keep them from deflating. 
Once you have your balloons inflated, organize them into your desired shape.
I started from the color red down.
Place pieces of rolled tape onto the back of the balloons and stick them on the wall.
Once the balloons are organized into your rainbow, blow up your white balloons and tie closed.
Tape the white balloons to the end of your rainbow to imitate clouds.
I used 6 balloons at each end.
Enjoy!


I will be honest, this took more work than I originally thought...
 But it was worth it!
It's such a fun statement piece for any celebration.
And now I am a balloon wizard for future balloon crafts!
Have you ever made a balloon statement piece?


All my love,
Autumn
Sunday, January 12, 2020

My 2019 Favorites

Hello everyone!
Since the start of the new year, I have been reflecting over 2019 quite a bit.
I definitely let myself splurge more than normal (it was one of my resolutions!) and as a result, I discovered a few new things that quickly became my favorites.
I thought it would be fun to share these with you.
Maybe they will become some of your favorites too!

Nike Tanjun Shoes


For Christmas 2018, I received my first pair of Nike's.
I noticed a difference immediately.
They literally added a bounce in my step.
I am on my feet all day at work and these were a game-changer.
I am hoping to add another colorful pair to my wardrobe soon.

Goodfellow Crew Neck Sweatshirt


While shopping with Erik at Target I saw a simple sweater in the men's section that I took interest in.
I had wanted a cozy oversized sweater to lounge around in at home and this looked like it would do.
I bought one on a whim and now have almost every color!
The perfect sweater for lounging, camping and running errands in.
And SO affordable!


Your girl loves her some glitter...
So, I was pumped to receive these as a gift.
And let me tell you, they were made for me.
These eyeshadows go on wet and dry within seconds.
They give me the perfect glitter eye for any occasion.
I just added another color to my collection and am so excited to rock it in 2020!

CycleBar


I had been wanting to try out a cycle class for a while and was finally able to accomplish that last year.
I fell in love instantly...
It is such a good work out and I love the positive atmosphere.
I have gotten a few people to classes with me through the year and they have agreed it is awesome!

Jean jackets have become so popular.
I love the laid back look and that they are so easy to style.
Erik surprised me with one and I loved mixing and matching it with things I already had in my closet.
I also loved adding pins to it to make it more colorful and unique.
I had so much fun adding all of my Disney pins to it and rocking it in Disneyland.
Such an easy and reversible way to style it.

Scrunchies


I jumped on the scrunchie bandwagon last year and never looked back.
Why we wrote off scrunchies, I will never know.
They are so soft on my hair, unlike elastics, and add a fun pop to the simplest of hairdos.
I am sorry we forsake you, scrunchies.
I will not make that mistake again... 

Novelty Bags


I have wanted to purchase a novelty bag for years!
I have had my eye on quite a few.
Most of them, Disney themed.
Surprise, surprise.
Since we were going to Disneyland in 2019 I let myself buy one when it went on sale.
And that quickly led to another and another.
These bags add the perfect touch of whimsy to any outfit and make adorable shelf decor at home.
I can't wait to add some more to my collection this year.

Sincerely Us Shop


I found this shop at a home show and it was love at first sight.
The whole booth was my aesthetic.
They have the cutest prints, blankets and candles.
I have only added one print to my collection so far but, have my heart set on a dozen more.
Plus, when you buy from them you are supporting a small business.
Who doesn't love that?

Bando Planner


I finally splurged on my first Bando Planner in 2019.
These planners come with everything.
Stickers, posters, and even coloring pages!
It was so fun that I had to get another one for this year.
I can't wait to fill it out.

Max Pillow


Even though this pillow has only been with me for a few weeks, the amount of joy it has given me is unmeasurable.
I became OBSESSED with it as soon as I saw it announced with the Oh My Disney dog collection.
I added it to my Christmas wish list and my sister made my dreams come true.
Every time I see him I can't help but get a smile on my face.

I'm so proud of myself for indulging a little more last year.
I can't wait to discover and play with new things this year.
What were some of your favorite things in 2019?

All my love,
Autumn