Showing posts with label Mother's Day. Show all posts

Sunday, May 10, 2020

Trying Reese Witherspoon's Sun Tea

Hello everyone!
Happy Mother's Day!
Erik and I recently tried Reese Witherspoon's recipe for Sun Tea from her book Whiskey In A Tea Cup.
It's actually her grandmother Dorothea's recipe.
I thought it would be the perfect post in honor of Mother's Day!


You will need:
8 Black Tea Bags
1 Gallon of Water


Place the tea bags in a gallon-sized jar with a lid and fill with water, letting the tags hang over the lip of the jar.


Top with the lid and secure.


Set the jar in a sunny spot outdoors.
Let brew for 4 hours.


While the tea brews, prepare the simple syrup.


You will need:
1 Cup of Sugar
1 Cup of Water


Bring the sugar and water to a boil in a small saucepan, stirring until the sugar has dissolved.
Remove from heat and let cool.
Serve the syrup on the side so guests can sweeten their tea to taste.
The syrup may be stored in the refrigerator, tightly sealed for up to 1 month.
Enjoy!


It was a lot of fun to make tea in a unique way.
Brewing it in the sun made it feel more rustic.
We brewed ours over the weekend and enjoyed it with some barbecue.
It definitely got us in the summertime mood.
What is your favorite summertime drink?


All my love,
Autumn

Sunday, April 26, 2020

3 Easy Ways To Decorate Macarons

Hello everyone!
Mother's Day is fast approaching.
I always like to give my mama a treat along with some fresh flowers. 
This year I decided to go with macarons.
They are beautiful and elegant which makes them perfect for Mother's Day.
I have never made my own macarons and I wasn't going to start with ones meant to be a gift so, I purchased some from a local bakery.
I wanted to add my own touches to them so they would feel a little more personal.
Here are the three ways I added my own decor.


Paintbrush Strokes


Add a few drops of almond extract (or another clear extract) to food coloring and mix to dilute.
Using a small food-safe paintbrush, add strokes to your macarons.
I did one with thicker strokes for a modern look.


And I did another with lighter strokes that really showcased the brushwork and gave it a more sophisticated feel.


Gold Leaf


Using baking tweezers (NOT your hands as the oil from them will dissolve the gold leaf) take small pieces of edible gold leaf and place them on the macaron.
I kept my pieces small and to one side.


Shapes and Initials


Add a few drops of almond (or another clear extract) to food coloring and mix to dilute.
Using a small food-safe paintbrush, gently paint your desired shape onto the top of the macaron.
I went with a heart.


Add a few drops of almond (or another clear extract) to food coloring and mix to dilute.
Using a small food-safe paintbrush, gently paint your desired initial onto the top of the macaron.
I went with an "M" for mom.


I also used the heart macaron as an "O" to spell out mom.


Package the macarons for gifting.
Enjoy!


Here's a little before and after.


I love how these simple designs added character and made the macarons feel a little more homemade and thoughtful.
What are you getting the ladies in your life for Mother's Day?


All my love,
Autumn

Sunday, April 12, 2020

Quick and Easy DIY Floral Initial

Hello everyone!
Springtime is upon us even though we are stuck in the house...
Today I am going to show you an easy DIY for a floral initial.
It's the perfect decoration to bring a little springtime to your home.


You will need:
Wood Initial
Flower Blooms
Wire Cutters
Hot Glue Gun
Hot Glue Sticks


Using the wire cutters, cut the flowers and leaves from the stems, getting as close to the base as possible to help them lay flat.
Starting with the large flowers, arrange on the initial in your desired position.
Add in the medium flowers.
Then the small flowers.
Then add in the leaves to fill in any open spaces.
Once the letter looks how you'd like, hot glue the flowers and leaves into place.
Let dry.
Enjoy!


This craft is super quick and simple.
It took me around ten minutes to create.
It would look so cute sitting on a shelf, or you can add it to other items around the house to give them some spring flair.
We added ours to our boxwood wreath on our front door.
It would also make the perfect gift for Mother's Day.
It's coming up!
Hint, hint.
How would you style a floral initial?


All my love,
Autumn 

Saturday, May 12, 2018

DIY Fruit Bouquets | Mother's Day 2018

Hello everyone!
Happy Mother's Day weekend!
Are you ever in the process of buying something and think to yourself, "I could make that for way less."
Every year I set out to buy fruit bouquets for Mother's Day but I forget one thing...
They are expensive!
This year I decided to put my money where my mouth was and make my own.


 You will need:
A Base, I used dollar bins from Target
Floral Foam
Aluminum Foil
A Cookie Cutter, I used a flower shape
Cabbage, Optional
Wooden Skewers
A Melon Baller
Fruit, I used Strawberries, Honeydew, Cantaloupe, Pineapple, Apples, and Grapes
Chocolate for Dipping, Optional, I used Dark and White Chocolate


Cut down your floral foam to fit inside your choice of base.
My bins tapered in towards the bottom so I had to cut them at an angle.
I used dollar bins from Target but you can use whatever works for you.
I have seen people use vases, boxes and even hollowed out fruit!


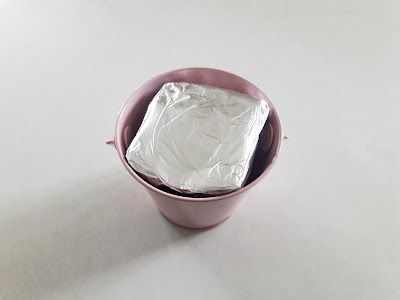
Wrap the floral foam in aluminum foil, this protects the fruit from coming into contact with it.


Cover the aluminum foil with cabbage leaves.
This step is optional, but it looks more like a store bought bouquet and covers the bright and shiny aluminum foil.


To create your pineapple flowers, cut the bottom and top off of your pineapple.
Turn the pineapple on its side and cut the remainder into half inch disks.
Lay your disks flat and center the cookie cutter on top.
Press down and cut the pineapple into the shape you prefer.
I used a flower but you can do a heart, star or even letters.
Remove the cookie cutter.
At this time dip the pineapple slices into melted chocolate if you desire.
Once the chocolate has dried, work the top of a wooden skewer through the middle of the pineapple about a quarter of an inch.
Be careful not to poke your fingers!
Set aside.
Cut your cantaloupe in half, stem to stem.
Remove seeds from the middle.
Using your melon baller create cantaloupe balls by pushing the melon baller into the cantaloupe down and around.
To get mine to lay flat I cut them in half and placed one half on the top of the wooden skewer point we worked through the pineapple.


To create the grape skewers, wash and dry your grapes.
Remove the grapes from their stem.
Work a wooden skewer through the bottom to the top of the grape and move down the skewer.
Repeat until you have a few grapes stacked upon one another.
You can stack as many grapes as you prefer, just make sure not to work the skewer all the way through your final grape.


To create the honeydew skewers, cut the honeydew in half, stem to stem. 
Remove the seeds from the center of the honeydew.
Cut each half of the honeydew into sixteenths.
Work a wooden skewer into the flat end of the honeydew slice until it is secure in the middle of the fruit.


To create the apple skewers, wash and dry the apples.
Cut the apples into eighths.
Remove seeds.
Work a wooden skewer into the end of the apple until it is secure in the middle of the fruit.


To create the strawberry skewers, wash and dry the strawberries.
Cut the stem off of the top.
 At this time, if you'd like chocolate covered strawberries, dip the strawberries into your choice of melted chocolate.
I used dark chocolate as my base.
Let dry.
Once the chocolate is dry, select another chocolate to melt, I used white chocolate, and place into a piping bag.
Cut a small hole at the tip of the piping bag.
Starting at the top of the strawberry work your way around and create a swirl design.
Once the chocolate is dry, work a wooden skewer into the the middle of the strawberry.
Be careful not to break through the top!


Work your finished fruit skewers into the floral foam until you have arranged them in a design you like.
I tried to create layers by placing the fruit skewers up front deeper into the floral foam than the skewers at the back.


I used two different sized bins to create a large and small fruit bouquet.
The larger bouquet will be for my mother.
The smaller bouquets will be for my sisters.


To ensure the fruit would last until I could gift my bouquets I added a little lemon juice to them once they were arranged.
I feel like these turned out pretty good for being homemade and I think my mom and sisters will really enjoy them.
All together the fruit cost under $30 dollars to make five bouquets!
That's what I call a steal.
What are you giving to the ladies in your life this Mother's Day?

All my love,
Autumn