Showing posts with label Thanksgiving. Show all posts

Wednesday, November 27, 2019

Happy Turkey Day!


All our love,
The Mineers

Sunday, November 17, 2019

Ariana Grande Inspired Thanksgiving Display

Hello everyone!
We are in the final countdown to Thanksgiving and I am excited to share this set up with you!
I have had this vision in my head for almost a year now and am so happy I was able to bring it to life.
Inspired by Ariana Grande's hit song Thank U, Next, I wanted this setup to be femme and fun.
I incorporated a lot of glam through amping up typical Thanksgiving elements with color.
It would be perfect to display at a laid back Friendsgiving or to fill with your favorite elegant desserts for Thanksgiving dinner!


The Backdrop


The focal point of this festive setup.
I used gold letter balloons to spell out the phrase "I'm so -ing grateful", a lyric from the song, and used a turkey balloon to bleep out the F word so I could take it to family gatherings without being a bad influence on my nieces and nephews.


The turkey balloon was originally a cartoon turkey but I needed to make it fit in with this fab set up so, I quickly applied a few coats of gold spray paint and let it dry before putting it up.
I think it worked out nicely, don't you?


The Bar Cart


I wanted the "tablescape" to match the glam feeling of the gold backdrop.
I thought a gold bar cart was the perfect touch.
I centered it underneath the backdrop and covered it with the goods.


The Food


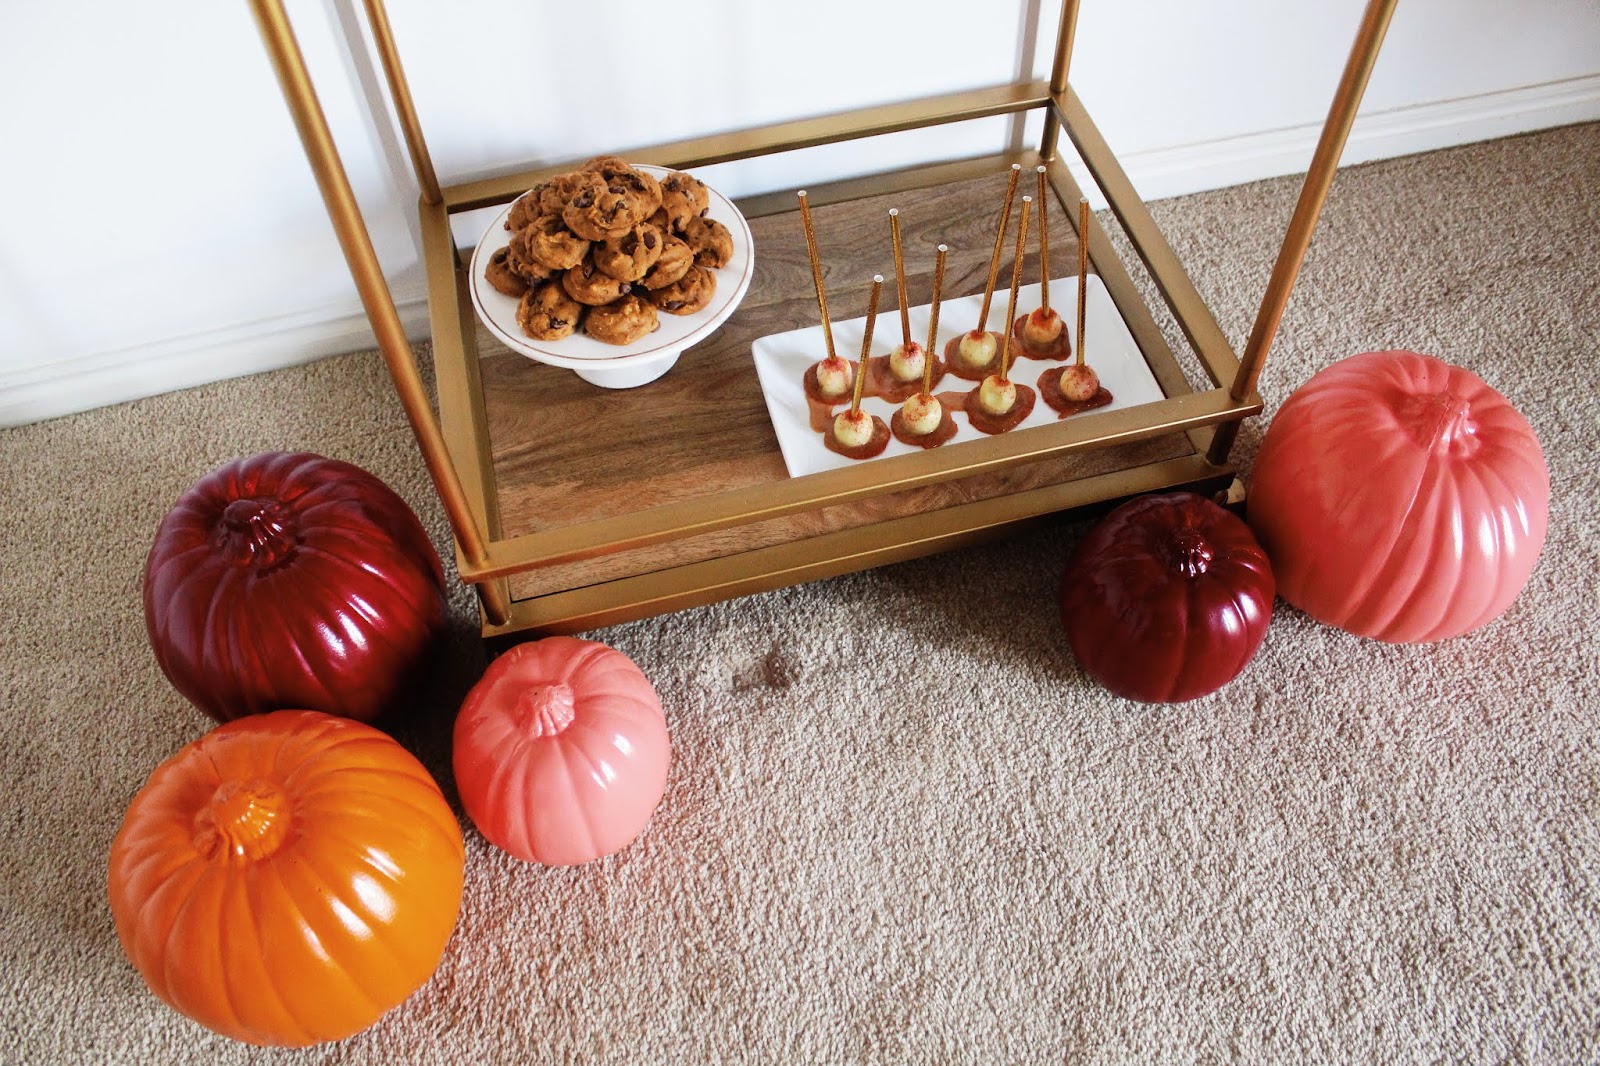
This bar cart display focuses on the most important part of Thanksgiving...
Dessert!
I made three fall-themed finger foods to nibble on.
Mini pumpkin pies, pumpkin chocolate chip cookies and mini caramel apples.
All easy to make and fun to eat!


Mini Pumpkin Pies


Instead of using pie dough for the crust, I used sugar cookie dough.
I rolled out the dough, cut out circles using a scalloped three-inch round cookie cutter and gently pushed the dough into a greased mini muffin tin.
I filled the center with one tablespoon of  Lauren Conrad's pumpkin pie filling.
Baked at 350o for 20 - 25 minutes.
Removed from the oven and let cool.
Once cooled I added a dollop of whip cream and sprinkled with nutmeg.
I served these on a white rectangular serving tray.


Pumpkin Chocolate Chip Cookies


I whipped up a batch of my other Grandma's famous pumpkin chocolate chip cookies.
I have never found a pumpkin chocolate chip cookie that beats hers.
I might be a little biased though...
Find the recipe for the cookies here.
I served the cookies on a white cake stand with metallic gold lining to add some height.


Mini Caramel Apples


Using a melon baller, I scooped out mini apples from a regular-sized Granny Smith apple.
I carefully placed a gold paper straw through the center of the mini apples and dipped them in melted caramel.
I added red, orange and pink sprinkles immediately to the wet caramel and let set.
I served the mini caramel apples on a second white rectangular serving tray.


The Drink


I wanted the drink to match the color scheme of the layout so we went with some non-alcoholic rosé.
I don't want to be a bad influence, remember?


I added pomegranate seeds to the champagne flutes to elevate the drink instead of serving it on its own.


The Pumpkins


To add more color to the display I spray painted craft pumpkins in three different colors,
Burgandy, coral and orange.
Yes, I spray painted an orange pumpkin orange...
I needed it to have a sheen like the others and cover the stem!


I spray painted the pumpkins until my desired coverage was reached making sure to let them completely dry between coats.
Once the pumpkins were dry I placed them around the bottom of the bar cart for a fun twist on classic Thanksgiving pumpkins.


How fun is that?!
I love how the overall look turned out and it was all very easy to execute.
It's such a fun trendy theme and you can use the pieces for years to come!
What's your favorite part of the display?


All my love,
Autumn

Wednesday, November 13, 2019

Getting Ready For The Holidays + A Holiday Giveaway

Hello everyone!
As most of you know, I am a HUGE Christmas lover.
Christmas comes out at our house on November 1st.
Hate if you want, but it works for us.


Christmas can be a lot...
There's so much to do, see, and buy.
I find that getting out Christmas early saves me so much stress in the long run.
We usually hold back to respect others.
We hang lights on our house but won't turn them on until Thanksgiving weekend.
I try not to post daily about Christmas on Social Media...
This year, however, we are letting our Christmas freak flag fly.
The Christmas lights are on every night.
We have already watched several Christmas movies.
All the decorations are up.
Christmas music is heard constantly through the house.
And we have baked quite a few goodies.
Erik says it's his goal to see if I can actually get sick of Christmas.
FAT CHANCE!


Don't get us wrong, we absolutely love Thanksgiving too!
Our Thanksgiving decor is up as well and we have baked many a fall goodie!
There's just not a lot to do for Thanksgiving...
We usually group the two together and party for two straight months!
When does Christmas go up at your house?
November or December?


All my love,
Autumn


P.S. I am hosting another giveaway on my Instagram.
It is for some Hearth and Hand bakeware to help you get baked this holiday season!
Head over here to enter.

Sunday, November 10, 2019

3 Quick and Easy Thanksgiving Decor DIYS

Hello everyone!
The season of Thanksgiving is fully upon us!
I struggle with Thanksgiving decor...
That's one of the reasons I put up Christmas in November.
But, there are a few things that say Thanksgiving to me.
Candles, pumpkins and greenery.
I felt that my decorations were getting boring after years of the same thing so, I decided to update them a little bit.


Greenery Candles


You will need:
Candles
Twine
Greenery, I Used Fresh Sage


Simply place your greenery on your candle.
Tie into place with the twine.
Enjoy!


Pinecone Vase Filler


You will need:
Pinecones
Glass Vases
Fairy Lights


Simply add the fairy lights to the glass vase making sure to leave the battery pack out to operate.
Add in your pine cones.
Enjoy!


Pumpkin Succulents


You will need:
Pumpkins
Succulents
Knife
Wire Cutters


You can use real or fake pumpkins and succulents.
I went with fake so I could use them for years and years.
Simply cut a small hole in the top of your pumpkin large enough to fit your succulents.
Trim the succulents with the wire cutters if needed.
Place the succulents into the opening.
Enjoy!


How easy (and cute!) are those!
And each takes only a few steps.
It's the perfect way to update Thanksgiving decor you already have on hand or to throw together at the last minute. 
Which one is your favorite?


All my love,
Autumn

Saturday, November 2, 2019

Individual Green Chile Macaroni and Cheese

Hello everyone!
Today I am going to share our favorite mac and cheese recipe with you.
We originally started with this recipe and adjusted it to our liking.
We love that the green chiles and pepper jack cheese give it a kick!
I thought this would be the perfect side dish for all of the Thanksgiving festivities coming up this month so, I decided to bake them in individual servings.


You will need:
4 Tablespoons of Salted Butter
1/4 a Cup of Shredded Mild Cheddar Cheese
1/2 a Cup of Shredded Pepperjack Cheese
1/4 a Teaspoon of Sea Salt
1 Pound of Cellentani Noodles
1/2 a Cup of Shredded Monterey Jack Cheese
1/4 a Cup of Shredded Sharp Cheddar Cheese
1 Cup of Half and Half
1 Large Egg, Lightly Beaten
1/4 a Teaspoon of Ground Pepper
8 Ounce Can of Roasted Green Chiles, Drained
1/2 a Cup of Bread Crumbs
1 Tablespoon of Salted Butter


Preheat oven to 350o.
In a large pot, bring lightly salted water to a boil. 
Add the cellentani noodles and cook until just tender, about 11 minutes.
Drain well.
In a large saucepan, melt 4 tablespoons of salted butter.
Stir in the cooked pasta.


Add the half and half to the saucepan and stir.
In a medium mixing bowl, mix the mild cheddar, pepper jack, monterey jack and sharp cheddar cheese.
Add half of the cheese mixture and the egg to the pasta.
Sprinkle with sea salt and pepper.
Add the roasted green chiles and stir gently.
Transfer the pasta to 8 ramekin dishes.


Sprinkle the top with the remaining cheese.
In the now-empty saucepan, add 1 tablespoon of salted butter and stir until melted. 
Once melted, add the bread crumbs and stir until it creates a crumble.
Sprinkle the breadcrumbs over the cheese and the pasta.


Bake for 30 - 35 minutes.
Enjoy!


We absolutely love this macaroni and cheese recipe!
We have it at least once a month.
We like to sprinkle black lava salt over the top.
It takes the whole dish to another level.
What is your favorite Thanksgiving dish?


All my love,
Autumn

Monday, November 19, 2018

My Monday | Gratitude

Hello everyone!
With Thanksgiving this Thursday I thought it would be appropriate to talk about gratitude.
Do you ever find it hard to be grateful?
Maybe you have been feeling really down.
Maybe everyone else seems to be moving forward and you seem to be moving back. 
Maybe some bad news has been lingering in your mind.
I have felt this way.
I have felt this way often to be honest.
Something I started doing to help me change my outlook is to create a list of what I am grateful for each night before I go to bed.
I lay down, think over my day and list everything I am grateful for from it.
I start with the big more obvious things.
My husband.
My house.
My health.
And work my way down to the smaller more specific things.
Warm socks.
The fact that we had milk when I thought we were out.
Tissues with lotion in them.
By the time I am done I am usually crying from the overwhelming realization of how blessed I am.


| via |

In this day and age it is so easy to get lost in material belongings.
Everybody seems to move from thing to thing so quickly.
Each day brings a new purchase.
A new announcement. 
A new must have.
We take the small things for granted and forget how blessed we truly are.
I challenge you to keep a list of what you are grateful for this week.
By the time Thanksgiving comes around I bet you will find your list much longer than you expected.
And the things we should be focusing on will become our priority.
Happy Thanksgiving!

All my love, 
Autumn

Sunday, November 18, 2018

DIY Thanksgiving Place Cards

Hello everyone!
Can you believe Thanksgiving is just four days away?
I am so excited to gather with my family and enjoy some delicious food.
Since Thanksgiving is such a food orientated holiday I like the focus to be on the table.
This year I created three fun place cards that can be made with things you probably already have on hand.


Gold Leaf Place Cards


I saw these place cards on Pinterest several years ago and fell in love.
They are so easy to make and turn out beautiful!

You will need:
Leaves
Spray Paint
Marker

Gather your leaves.
You can use silk leaves if you'd like something a little more sturdy or reusable.
I used real leaves that I found down the street.
Simply spray paint the leaves gold.
Let dry completely.
Using a marker write the name of your guest in the center of the leaf.
Be careful not to apply too much pressure because the leaf will break.
Place on a plate.
Enjoy!


Feather Place Cards


When trying to think of something else that was Thanksgiving themed other than pumpkins and leaves I thought of feathers.
You know, like a turkey?
I went on a hunt for some wild turkey feathers but wasn't able to find any that could be delivered in time.
I wanted them to look natural so instead of using regular craft feathers I used these guinea feathers to get the brown and cream colors.

You will need:
Feathers
Scissors
Cardstock
Marker
Baker's Twine

Cut out a 3 inch X 1 inch card from the card stock.
Write the name of your guest on the card.
Cut a small hole in the top left corner of the place card.
Feed the baker's twine through the hole.
Tie the place card to the bottom of the feather with the baker's twine.
Place on a plate.
Enjoy!


Gold Pumpkin Place Card


This is an easy way to add some glam to a plain pumpkin.
If you prefer the natural look or color of your pumpkins just add the place card.

You will need:
Small Pumpkins
Spray Paint
Scissors
Cardstock
Marker
Baker's Twine

Gather your pumpkins.
Lightly spray paint them gold.
Let dry completely.
Cut out a 3 inch X 1 inch card from the card stock.
Write the name of your guest on the card.
Cut a small hole in the top middle of the place card.
Feed the baker's twine through the hole.
Tie the place card around the stem of the pumpkin.
Place on a plate.
Enjoy!


The place cards were so easy to make but add a lot of personality to the table.
I am excited to see them on display during Thanksgiving dinner.
Who's coming to your Thanksgiving dinner?


All my love,
Autumn